

This blog includes complete steps on How to connect database in HTML form with MySQL using PHP. Here, we will discuss the process to save HTML form input fields for a MySQL database connection to a database table using PHP programming with an example. This article covers HTML forms, DB + table SQL code, Bootstrap 5 with CSS, form validation, and database connection + submission code.
The Step by Step Guide to Connect Database in HTML
Are you looking about how to connect database in HTML form with MySQL using PHP? You can learn easily to connect database in HTML with 5 helpful steps. Here, we are going to take you through the step by step guide to connect database in HTML. Don’t worry, it won’t be much complicated because we are here to help you do it with easy steps.
Tools Required to Connect HTML Form with MySQL Database
First, you need to install XAMPP, WAMP, or MAMP software (for Mac OS) on your laptop or computer. This software allows you to get a local web server Apache with PHP language and MySQL database.
The PHP and MySQL examples in this article are database connections in XAMPP code.
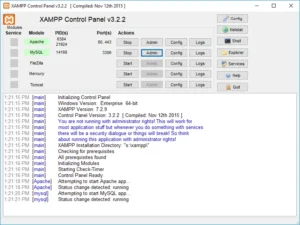
After installation, you can open the XAMPP control panel by searching it in the Windows search bar:
After installing any of these laptop or desktop software, you need to check whether your localhost is working. Open any browser and open this URL http://127.0.0.1 or http://localhost/ to check it’s status. If this works, it means you have PHP/MySQL enabled on your local web server.
Additionally, the GUI PHPmyAdmin is included to handle CRUD operations. H. Insert (create), update, delete, and select (read) records from a table. This interface is browser-based and very convenient and easy to use for creating and managing phpmyadmin databases with tables (columns, rows).
With the above installation, you can start coding.
If you don’t have a LAMP stack-based web server, you can do this directly in your hosting area.
If you have any further questions, please comment on this post. We will respond to your requests.
Suppose you have a website that allows you to insert contact form field data into a database. To do this, you need to follow these steps:
Step 1: Filter the HTML Form for your Web Page
Assume that you have selected the form fields Name (text input), Email (email input), Phone number (numeric input), and Message (multiline text). After that, a “Submit Form” button is also required to submit the form. You’ll get the complete form with HTML coding in the step 3 of this process.
Step 2: Create a MySQL database and a Table
Open a web browser (Chrome, Firefox, Edge, etc.) and type http://localhost/phpmyadmin/ or http://127.0.0.1 /phpmyadmin/ to open a GUI for managing databases on your computer. Masu. See what happens next in the xampp screen below.
Click the database link and create a database named ‘db_contact’.
After creating the database, you need to create a table with any name. Select field number 5, “tbl_contact.” Select the four fields above (name, email, phone number, and message). The first column holds the serial number and technically the primary key (the unique number for each record).
Click the Next button to display this screen. Next, you need to provide information for each field.
Fields used for field names Name – fldName, Email – fldEmail, Phone – fldPhone, Message – fldMessage.
Next, click the “Save” button at bottom right of screen and it will create a table in the database.
You can create the database and tables using the following SQL: You must copy and paste the following code into the MySQL GUI, phpmyadmin database, or any other GUI or command prompt.
--
-- Database: `mydb`
--

CREATE DATABASE IF NOT EXISTS `db_contact` DEFAULT CHARACTER SET latin1 COLLATE latin1_swedish_ci;
USE `db_contact`;

-- --------------------------------------------------------

--
-- Table structure for table `tbl_contact`
--

DROP TABLE IF EXISTS `tbl_contact`;
CREATE TABLE IF NOT EXISTS `tbl_contact` (
`id` int(11) NOT NULL,
  `fldName` varchar(50) NOT NULL,
  `fldEmail` varchar(150) NOT NULL,
`fldPhone` varchar(15) NOT NULL,
`fldMessage` text NOT NULL
) ENGINE=InnoDB DEFAULT CHARSET=latin1;

--
-- Indexes for dumped tables
--

--
-- Indexes for table `tbl_contact`
--
ALTER TABLE `tbl_contact`
ADD PRIMARY KEY (`id`);

--
-- AUTO_INCREMENT for dumped tables
--

--
-- AUTO_INCREMENT for table `tbl_contact`
--
ALTER TABLE `tbl_contact`
MODIFY `id` int(11) NOT NULL AUTO_INCREMENT;
Step 3: Create an HTML Form to Connect the Database
Next, you need to create an HTML form. To do this, we first need to create a working folder and then create his web page called contact.html. When you install xampp, a working folder is created in the E:\xampp\htdocs folder. You can create a new Contacts folder in your working folder on localhost. Create a contact.html file and paste the below mentioned code.
<!DOCTYPE html>
<html xmlns="http://www.w3.org/1999/xhtml">
<head>
<meta http-equiv="Content-Type" content="text/html; charset=utf-8" />
<title>Contact Form - PHP/MySQL Demo Code</title>
</head>
<body>
<fieldset>
<legend>Contact Form</legend>
<form name="frmContact" method="post" action="contact.php">
<p>
<label for="Name">Name </label>
<input type="text" name="txtName" id="txtName">
</p>
<p>
<label for="email">Email</label>
<input type="text" name="txtEmail" id="txtEmail">
</p>
<p>
<label for="phone">Phone</label>
<input type="text" name="txtPhone" id="txtPhone">
</p>
<p>
<label for="message">Message</label>
<textarea name="txtMessage" id="txtMessage"></textarea>
</p>
<p> </p>
<p>
<input type="submit" name="Submit" id="Submit" value="Submit">
</p>
</form>
</fieldset>
</body>
</html>
The form is now ready. You can test it with the localhost link: http://localhost/contact/contact.html
The next step is to move on to writing the PHP/MySQL code.
Step 4: Create the PHP Page to Save Data from HTML form to MySQL Database
The Contact HTML form action is located on the contact.php page. On this page, you will write code to insert records into the database.
To save data as records in MySQL, you must first connect to the database. Connecting the cord is very easy. PHP’s mysql_connect has been deprecated in recent versions, so we used it here with mysqli_connect.
$con = mysqli_connect("localhost","your_localhost_database_user","your_localhost_database_password","your_localhost_database_db");
You must set the username and password values for localhost. Usually, the MySQL database username on localhost is root and the password is blank or root. For example, the code is:
$con = mysqli_connect('localhost', 'root', '',’db_contact’);The “db_contact” is the database name that we created before.
After the connection database, you need to take the post variable from the form. See the below code
$txtName = $_POST[‘txtName’]; $txtEmail = $_POST[‘txtEmail’]; $txtPhone = $_POST[‘txtPhone’]; $txtMessage = $_POST[‘txtMessage’];
If you want to retrieve the post variable, you need to write the following SQL command:
$sql = "INSERT INTO `tbl_contact` (`Id`, `fldName`, `fldEmail`, `fldPhone`, `fldMessage`) VALUES ('0', '$txtName', '$txtEmail', '$txtPhone', '$txtMessage');"To query the database, you must write the following line:
$rs = mysqli_query($con, $sql);
This is PHP code for inserting data into a database from a form.
<?php
// database connection code
// $con = mysqli_connect('localhost', 'database_user', 'database_password','database');

$con = mysqli_connect('localhost', 'root', '','db_contact');

// get the post records
$txtName = $_POST['txtName'];
$txtEmail = $_POST['txtEmail'];
$txtPhone = $_POST['txtPhone'];
$txtMessage = $_POST['txtMessage'];

// database insert SQL code
$sql = "INSERT INTO `tbl_contact` (`Id`, `fldName`, `fldEmail`, `fldPhone`, `fldMessage`) VALUES ('0', '$txtName', '$txtEmail', '$txtPhone', '$txtMessage')";

// insert in database
$rs = mysqli_query($con, $sql);

if($rs)
{
	echo "Contact Records Inserted";
}

?>
Step 5: The Task Completion
The coding part is now complete. If you want to check this, you can fill out the http://localhost/contact/contact.html form and check the results in our database. You can view the inserted records via phpmyadmin.
Why to Connect Database in HTML?
By creating connections between databases, you give HTML web pages the ability to communicate with data stored in databases. This connection enables many functions such as user registration, login procedures, content management, and e-commerce. Here are some of the reasons why to connect database in HTML:
Data Storage and Retrieval
Databases provide a reliable and effective way to store large amounts of structured data. We may store user information, product information, blog posts, comments, or other types of data necessary for our applications by connecting our HTML web pages to a database. This allows you to dynamically retrieve and display stored data on your website based on user requests or specified criteria.
Dynamic Content Generation
By integrating HTML web pages with a database, you can create dynamic content based on user preferences and system conditions.
Data Integrity and Security
Databases provide tools to ensure data security and integrity. By integrating your HTML web pages with your database, you can implement validation checks for user input and prevent inaccurate or malicious data from being saved. Encryption, access controls, and backup procedures are some of the additional security features provided by databases. These steps prevent unauthorized access or loss of sensitive data.
User Engagement
HTML web pages connected to a database enable user interaction. For example, information that you enter into forms on her website (such as registration forms or contact forms) may be stored in a database for later use or processing. When users leave reviews or comments on the website, similar input may be stored in a database for display or analysis.
Scalability and Performance
Linking your HTML website to a database improves scalability and performance. By optimizing storage and retrieval processes, databases can effectively handle the increased load that comes with increasing amounts of data. This ensures that your web application continues to function properly even if you have many users or a large amount of data to process.
Conclusion
In conclusion, connecting a database in an HTML form with MySQL using PHP may seem tricky at first, but with the right steps, it’s a process that becomes easier to manage. By following the guide we’ve outlined, you can set up a seamless connection between your form and the database, allowing you to store and retrieve data effortlessly. Remember, always prioritize security by using prepared statements to prevent SQL injection. Whether you’re a beginner or looking to brush up on your skills, taking the time to learn this process will pay off in the long run. At WebAllWays, we understand the importance of both strong coding practices and SEO to ensure your website performs well across all areas. If you have any questions or need further assistance, feel free to reach out—we’d love to help you succeed!